Sunday 17 March 2013
Replacing damaged components
Hello,
On this tutorial you will learn and I will show you how to replacing damaged components. On this tutorial I will use example of replacing damaged computer case because that can be pretty complicated than replacing for example damaged mouse or keyboard. So we can start now of the beigining..
First of all you will need to replace your computer case it it is damaged or has visible scratches on it. So you will need to buy an attractive new case to your computer, but also make sure that you have '+' screwdriver and anti static wristband for this small and easy task. Okey so the first step is:
- Select a new case form for your computer. Choose case depending on configuration and color that match your computer together, for example if you have white monitor and other components are the same colour, you will need to buy white case to match with other computer components. You need to remember about chooseing the right size!
- Make sure your computer are turned off, and you can starting changing the case of your computer.
- Unplug all cables that are attached to the computer, but you must be very carefull.
- Then when you unplug all cables that been attached with computer, use '+' screwdriver to open the existing computer case. Rotate that screwdriver to loosen every screws.
- After it, slowely remove the case from the rest of the components.
- When you already buy the new case then take it and align that case with your CPU. Push your new case gently and align it till you will hear a snap. If you do this and you hear snap sound that means the case has been placed in the correct position, and everything is fine.
- Reattach all of the screws that you removed earlier.
- Reconnect all of the cables in their slots.
- Last thing is to switch your computer 'on' and check to see that your machine working correct as should be work.
Thank you,
Bit by Bit Computer
Replacing consumbles (printer paper)
Hello
Next tutorial today is about how to replacing printer paper on your printer. That should not take a long time, so tutorial will be short but helpful and useful. Okey so lets start my next tutorial..
Printer paper: uses example of Microsoft Word on which person can develop they every little print option I will write an short explanation of how to change a option printing. So, if our printer has option to print on A4 size, it means that person must have some A4 papers to print somethning it also means if printer has choosen option on printing with A4 paper then if you put for example A5 paper into printer that will be not print any document for you, so you have to remember that. There are option to choose printing option from changing paper size printing, so if you decided to printing documents on A5 size then you have to change paper size on Word and then if you change paper size and you put that size of paper into printer that will be printed documents on that expected paper size.
How to change prining option in word?
Go to file > Print and there are settings that we already have, so look on settings and 5th box is paper size that we use to printing, click on that arrow behind and you will see every size option to choose. And then if you change size of paper then you can now print on this size. Put correct size of paper into printer and then click 'print' and that will be printed for you on this expected size.
Thank you,
Bit by Bit Computer
How to cleaning hardware?
Hello,
On my next tutorial today, I want to show and explain you how to clean your hardware components into your computer. There are lots of way on doing it, but we will do this best that of course we just can. So today I want to write a step by step tutorial on which I will explain you how to clean a keyboard and mouse of your computer.
Lets start of starting first of all of how to clean your keyboard.
KEYBOARD: First of all we have to know that any computer and also laptop keyboards are most often germinfected components into computer. By cleaning it that will help to remove any dangerous bacteria that we have into it. Any dust, dirt and bacteria can also causing badly on the keyboard to not funtion properly. So now after that little introduction, I will explain you how to clean keyboard.
Cleaning keyboard: First step that you must do before cleaning the keyboard is turning off the computer, or if your keyboard is using by USB then you have to unplug it. Don't worry if you unplug keyboard, every different computer component will stay fine, and will not be causing any problems.
Common way to clean your keyboard is turning it upside down and shaking. It can be good, but basically this not clean everything from your keyboard. A more effective way to clean your keyboard is uses compressed air. Compressed air is pressurized air that is contained in a can with a very long nozzle. Aim the air between the keyboard keys and blow away all of the dust and debris that has gathered there. Okey now, if you want to clean the keyboard more extesively then you will need to remove the every keys from the keyboard.
MOUSE: The optical mouse is most common mouse in every computer today, optical mouse requires less maintenance, but it still can eventually build up dust and dirty making your mouse not very good when you want to work with it.
Cleaning mouse: First of all, turn your computer off and unplug the mouse. Then if you already unplug your mouse look on the lens on bottom of mouse. If you see on the bottom any debris, the best thing is blow it off, or if that doesn't help then take cotton swab and rubbing alcohol and lightly clean the lens on the bottom. Next step look on little rubber pads on the bottom of mouse. Dust and dirt are common tends that is build exactly here. Scrape as much of the gunk off as you can uses paper towel. Wipe any other remaining dirt and dust off the pads of your optical mouse with uses a damp cloth. And then last thing to fully complete cleaning mouse is plug mouse into computer, and enjoy your newly cleaned optical mouse into computer.
Thank you,
Bit by Bit Computer
How to deleting temporaty file?
On this video you will learn and I will show how to deleting temporary files from your computer. There are not many things to do, but to do this correct you should follow this tutorial on which everything is shows.
Thank you,
Bit by Bit Computer.
How to defrag your computer?
Hello..
Today on my next tutorial I want to show you how to defrag your computer. Everything will write on the steps, so you will doesn't have any problem with this tasks. Lets start step by step.
First of all, before you will defrag your computer you have to do number of steps before the defragmentation. You have to remember about this steps before and defragmentation.
On Windows operating system places files and programs on a hard drive where there is space, once the file is necessarily by located in one physical place. On your hard drive over time was become fragmented of thousandts of different files, the older and newest, but basically that can slow down your computer because it takes longer time for access to information. This is why people use defrag program to increase speed of computer.
This process of defragmentation places all parts of a files together in the same place on the drive. This organizes all directories and files according to how you use your computer. After whole process is complite, your computer will most run faster and speed up of your computer will be increased.
Just remember about copying or backup all work files, photos etc. into another hard drive, CDROM, DVD or other type of media. Also close programs that are currently open on right hand side of the task bar.

So now you when you are ready then open the defrag program with following steps:
Click on the Start button,
Click the programs icon,
Click Accesories icon,
Click system tools icon, and then last thing
Click the 'Disk defragmentation' icon.
This will open an defragmentation program.
Next step:
When you open the defragmentation program then click on Analyze button , wait a second the program will analuze your hard drive.
Do exactly this what screen said, so if it says your hard drive does not need defragmentation, you can close the program.
 But if your hard drive needs defragmenting, you have to click on defragment button on the right hand side. Then, you will have to wait to allow the program to do it's work. It will take about 30minutes to several hours, but that is just depending on:
the size of your drive,
the amount of defragmentation,
the speed of your processor,
the amount of your operating memory.
When the program has completed whole process, then you can close the program window.
Make sure if its common any error messages make note of the error and print the log of this process to use in future maintenance or repair of the drive.
That should be everything, make sure you follow the tutorial to fully understanding whole process.
Thank you,
Bit by Bit Computer.
Automatic scheduling and deletion of unwanted data
On this video you will learn and see example of how to delete unwanted data form your computer correctly. Enjoy the video, hope this helps exactly you.
Thank you,
Bit by Bit Computer.
Back up procedures
On this video you will learn how to use and do back up procedures. On this tutorial I cover to online and backup media procedures, so this should be help you understand how this works.
Enjoy,
Thank you,
Bit by Bit Computer
Friday 15 March 2013
Organisation and naming of file
On this tutorial you will learn how to organize and name your file to stay fully organized with every file. I was write an every little steps, so everything should be clearly explained and show on tutorial.
Enjoy,
Thank you,
Bit by Bit Computer
How to create a start up options for a person with RSI?
On this video you will learn how to create a start up option. On Windows system you will do 3 steps to make a start up option by your own. I writing this steps on tutorial but also I will write that steps below the text.
You will have to noticet that you have a folder into start up menu called 'startup'. Anything what you put on this folder will launch automatically with Windows on start, so to do this thing you will have to:
1. First open up Start > All Programs, and search through on the menu for that application what you want to start at boot your Windows. If you already find that application then right click on it and hit 'copy'. This process will copy the application shortcut.
2. Find the startup folder into All Programs and right click on it, then hit 'open' and this will open up folder window.
3. Then the last thing is right click anywhere inside that folder window and hit 'paste'. This process desired programs shortcut and then this should pop ritgt up in the folder, and on the next time when you will log into Windows that program will automatically start up with Windows.
If you want to program to stop lauching with your Windows, then you have to go back to the startup folder and just right click on application on startup folder and click 'delete' this will delete the shortcut from startup folder and this will be never again will opened with start up your Windows.
Thank you,
Bit by Bit Computer,
Saturday 9 March 2013
How to set file sharing permission?
Thank you for watching,
Hope this helps you,
See you on the next tutorial soon.
Bit by Bit Computer,
Friday 22 February 2013
How to edit anit-virus configuration?
On this tutorial you will learn how to edit anti-virus configuration.
Please Enjoy the video! :)
Everything explained step-by-step, so you should doesn't have any problem to understand.
Hope on this tutorial I helps you a littleby and now you are sure how to edit anti-virus configuration into your computer by your own.
Thank you,
Bit by Bit Computer
How to create and reconfigure application toolbars?
Enjoy the video on which I will show you how to create an toolbars for your Internet Explorer 8 application. Follow step-by-step to makes that clearly. On tutorial is shows how to create your own toolbar to Internet Explorer 8 and also how to make it default if you decide to leave the original toolbar of your application!
Thank you,
Bit by Bit Computer
How to editing the desktop for person with visual impairment?
On this tutorial in the top you will learn how to editing desktop specially for the person with visual impairment. On tutorial is shows how to edit background, colour, size of icon and what type of icon choose specially for that person. Enjoy the tutorial, hope this helps you customize your own desktop specially for perso with visual impairment, maybe after you will need that to know. :)
Thank you,
Bit by Bit Computer
How to do the functionality test?

Today on my next tutorial I will show you two ways of do functionality test. The first way is a table where I write what you must do to test the functionality into your computer. The second way what I going to show you is 'short videos' on which I will show you how to check functionality into your computer. So the first way is making a pretty similar table to my on which you will write on each section about how software works or how this supposed to be works, and like I said the second way what I want to demonstrate into my tutorials is 'short videos' on each one to clear understand for everyone.
1. The correct data and time are set.
To check that the correct data and time are set into computer we must:
Click on windows clock, the clock is on the right down side on the Windows bar.
So click on it and then if time and data are not correct then we click on option below the clock and data 'change date and time settings' and on our screen will be come up window with date and time. There we have option 'change date and time' click on it and will be come up date and time where we can change it by yourself. If you change the actuall time and date and you are happy with it, click on 'OK' button and actuall date and time will be set.
2. Desktop shortcut go to the right place.
To check that shortcut goes to the right place we just must right click on icon for example on desktop and go to 'properties' and then if it's an shorcut we will see an 'location' of this file and that will show where this folder is. If we looking for original folder and we have shortcut of it on desktop, then 'right' mouse click on this folder and click 'properties' and we will seeing 'target' this shows where the original application or this what we looking for is originally installed and placed into our computer.
3. The correct device drivers are installed.
To check that on our computer the device drivers are installed we should just to do two things. On Windows 7 there are easy thing to follow to check all our device drivers what we have into computer installed. Go to start menu bar and find on bar slash 'devices and printers'. When we see that slash left mouse click on it and on our screen will be open an window with every devices and printers what we use and what we have installed into our computer. If on 'devices' and 'printer & faxes' slashes are every devices showing that automatically means everything are correctly installed.
4. Software application open and work as intended.
To check that our application are open and work as intended we first of all open the application for example (Microsoft Word) then two times click on the icon of that application and this should be opened. If it open, try do something on it to check that Word work as intended. If everything working fine on Word and you are happy with it that means your application are open and work as this should be works, but what if you double click on Microsoft Word and this occur on error or will doesn't want to opened? Then the easiest way to lauch work that program is uninstall that application and install it again, this should be help and after installed again should be working everything fine. So to uninstall any application no just an Microsoft Word we go to start menu bar and then 'control panel' , after it we go to 'programs' and 'uninstall a program'. We should see whole lists with every programs that we have on computer, find this application what not working correct and then on top left hand side you have to click 'uninstall' to delete that application from computer. Then if you want this application again use, you have to install it again into your computer. This should be helps you to run program if it's needed, just install it again and try run.
For (M3) criteria :
 Here is a example of performance of computer system. Maximum score is 7.9 and the lowest is 1.0. On processor section there are calculations per second rated and the subscore of my processor is 7,3. On the overall rating of 7.9 this processor have 7.3 score and this means processor is really fast, but it can be much faster and then on subscore will be total scale of 7.9, but 7.3 rating shows the processor what is so important are fast and working on high performance speed. On RAM section there are rated memory operations per second, overall score is always the same so it is 7.9, subscore of this RAM are 7.3. It means that RAM on this computer also working on fast performance, so on this point I can be happy. Nothing more to add on this section, everything working on higher performance. Next is graphic on which subscore is little bit lower, 3.1 of maximum 7.9 means that graphic on this computer working on lower performance and looking not too good, but basically as not tu bad as well. Subscore on graphic section is not too bad but basically is not rewarding. 4th component on this table is gaming graphic with subscore of 4.3 over 7.9, basically looking on other components that gaming graphic probably is not too bad, of course if person don't play games on this computer, but if play that could be little bit worried but you still can play on it, just you have lower performance of graphic on game. And the last component is primary hard disk which subscore is high 5.9. On this section was rated data transfer, so it means how fast transfer data is on it. Over 7.9 subscore of 5.9 are high, this automatically means the transfer date are fast, but well can be even faster than subscore of 5.9. Base score of overall scores is 3.1
There was score current from 25/11/2012.
And here is upgraded version of the same performance. Processor and RAM memory stay on the same subscore as been before, graphics was before on 3.1 and now is going up to 4.2 on overall 7.9 score which is positive changing. Gaming graphic was 4.3 before, and now is up to 5.0. Primary hard disk stay as been before. And the base score was up to 4.2 which is fantastic changing again.
 By one click on Re-run the assessment overall rating of system components increasing up. There are up base score which was 3.1 before and now is up to 4.2 , and also some others components just increase up by increasing overall performance of this computer. Everything change on positive way, by increase up the performance of my computer.
There was score current from 17/03/2013.
Hope this helps,
Thank you,
Bit by Bit Computer,
How to install Open Office?
On these tutorial it will be explaining and showing step-by-step how to install an Open Office into your computer. Please follow the tutorial for clear installation, if you follow this tutorial you should doesn't have any problem with it. Whole process are easy but someone can't know how to do this and use correctly. So first of all 'download' free version from the internet of Open Office and then.... follow the tutorial for the rest of explanation.
Hope that video helps you, and now you are happy to install an Open Office by your own.
Thank you,
Bit by Bit Computer
How to create appropriate folder structure?
On this tutorial you will learn how to create a 'folder structure'. Everything I show step-by-step for you, so with my tutorial you should now create your own folder structure with doesn't have any problems with it.
Hope this helps you with creating your own folder structure.
Thank you,
Bit by Bit Computer
How to install and set up security software?
On this tutorial you will learn how to install and set up the security software (anti-virus). The whole process are easy to download and after it to set up and upgrade it. Everything are on the video, so you should doesn't have any problems with it.
Enjoy video..
Thank you,
Bit by Bit Computer
How to device drivers works?
On this video you will learn 'how to device drivers works' on Windows 7. They are automatically installed and updated, so you do need spend extra time to install them manually. The same is on Windows 8 drivers are automatically updated and installed.
On older version of Windows you have to install drivers manually by using a CD. On older version you will have every driver on CD so if you want to use something using your older system then you must install everything manually.
Thank you,
Bit by Bit Computer
Monday 18 February 2013
How to edit BIOS configuration?
Welcome again on my next short tutorial on which I will demonstrate you how to setting a BIOS password. I will explain everything on details step by step..
If we are ready then we can start of the beginning, this settings will be spend on about 5mins work ;-)
Okey we are ready, lets start of the first step ;-)..
So the first step you must open your BIOS in your computer, to do this you must click one of the keyboard button. On Windows 7 to open BIOS you must click 'F2', but it can be different on your system, so you should be click many buttons to find this one that can access you to BIOS.
1. When you already open your BIOS configuration you then must left mouse click on 'Security'.


2. When you click on 'Security' you will see an options 'Set User Password'. To change our passwords we must left mouse click on this and after that on our screen will be come up a box where we must type in a new passwords.
3. The box looks like this on pictures behind. Here next step is to type in a new BIOS passwords. So when we already think about the new passwords and we are type in the new password on these box then...

 5. Now our passwords are changed and we have new user passwords sets on BIOS :)
 6. If you are unhappy with your new passwords and you want to clear that passwords you just need to simply click on 'Clear User Password' which mean that when you click on this that your passwords will be clear..
If you follow my tutorial you will doesn't have any problems with set up new passwords into your BIOS configuration.
Thank you for watching my tutorial on which I explain 'how to change a BIOS passwords'.
Hope that tutorial are helpful and useful for you, and now you can change a BIOS passwords :)
Bit by Bit Computer
How to install an Operating System?
Today on my next tutorial I want to show everyone how to install an Linux Ubuntu 12.0
Well that is not hard process to install an Linux but it will helps you making sure that everything is fine.
Everything will be showing step by step for clearly understanding.
Lets start! ;-)
1: Download for free from the Ubuntu official page free version of new Ubuntu 12.0
2: Safe it on USB and wait for download. It is about 800 MB.
3: After when your Ubuntu is already download on your USB, you can start installation.
 First of all you will see that window on your screen. That means you can change your original option on it. You can choose from two size of installation: 5 GB and 6 GB. I decided to install a 5 GB version. You can change the installation drive it means that you can choose where you want to install your Ubuntu, also choose size of installation and what is so important you can add the password to your username. If you change everything on this what you want to be you and if you sure everything is correct then your last step on this installation is click 'Install'.
 After when we click 'Install' on screen will be window with Ubuntu Installer. On this windows every needed file what we will need to run Ubuntu are safed on 'drive'. On this process we will spend about 20mins, but don't worry! whole installation is going be maximum an 1 hours. Everything are installed now, so we can't used computer on this time :)
 Well next step on installation is 'copying files' that means every files are copyied on your computer. On Ubuntu installation when you decided to install this operating system are few of windows with 'copying' and 'installing' some needed files and objects, so installation will be littleby long but not longer than (1,30hours) so don't worry :)
 There is a last install window that are installing system on computer. Last installing window and we can use our new operating system. Installation of it will be not longer than 10mins.
 After when installation is done, on our screen will be displayed a window the same like on pictures behind. You will need to reboot your computer to complete the instalation. You can reboot computer now or later. I decided to reboot my computer later, but this is your decision when you want to reboot your computer.
And the last step is when you choose when you want to reboot your computer click on finish button and your installation is fully complete! :)

After when your computer will be reboot and turned on then you can use your Ubuntu 12.0 on your computer. The screen will be look like that :)
Thank you everyone for follow my tutorials..
Hope this helps you install your own operating system into your machine.
Bit by Bit Computer
How to connect CD-DVD drive to your computer?
Today on my next tutorial I make little explanation about how to correctly install CD-DVD drive into computer. Sounds really complicate but with my tutorial it can be very helpful and useful for people who first time do this or don't know how to connect CD-DVD drive into computer. Well connect CD-DVD drive is work on about 20 minutes, sounds no real?? If you will follow my tutorial it can be real!! but you must do everything step by step like on my tutorial. So we are ready, and we can now start of the beginning ;-)


 Next step when you already put your CD-DVD drive into space for drives you will see on the left and right hand side two screws that you must screw for give your drive stability.
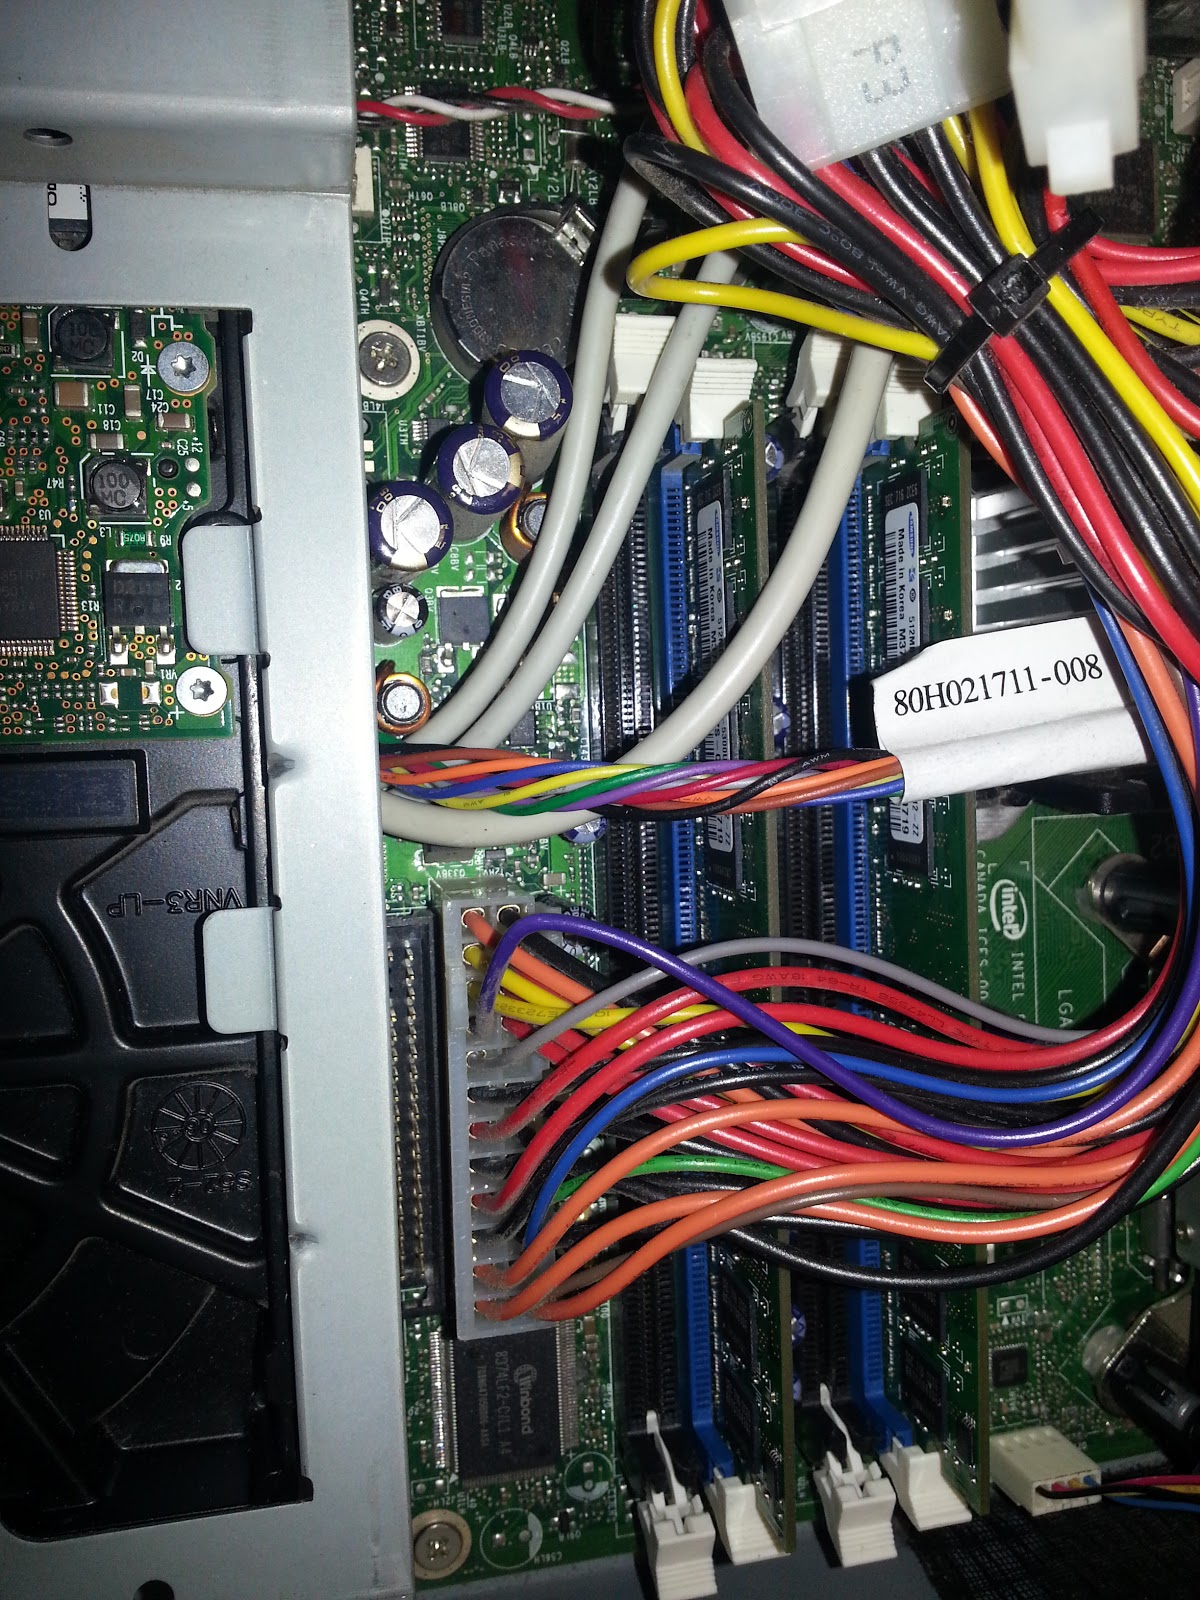
 Next step turn your CD-DVD drive to back for better seeing every ports that your drive have. Okey after when we already turned our drive and we see everything, find the white connector (with 3 different colors cables).
 Okey next, when you find the black connector of your CD-DVD drive you have to put it behind white connector on the right down side.
 That looks our computer after when we already put our CD-DVD drive into computer and connect with other parts. We are finished connect our drive into computer, so now we must check that everything working correct.
  And the last step is, when we connect our computer and CD-DVD drive works, that means you makes everything correct and now you can use your drive :-)
Hope this helps you and you now can connect your CD-DVD drive into computer and can use it with doesn't have any problems on it.. :)
Thank you
Bit by Bit Computer
Thursday 31 January 2013
How to connect a sound card?
Hello!
Welcome on my next tutorial, today I want to show you how to connect a sound card into our computer. Well sounds complicate but it isn't. On this tutorial you will learn step by step how to plug in sound card on motherboard. Okeey we can start next tutorial from beginning :-) Everything step by step.

First of all we can see how computer looks after when we takes out our sounds card from the motherboard. We must take off the one part of our cover and then take off from slots our sounds card.

This is how our sounds card looks after when we takes it off from our slots on the motherboard.

Well next step when we take card off, our computer will looks pretty similar to these images on the up. We can see the two the same slots where we can put our card, and from which we takes it off.

Now we put our sounds card into one of the slots on the motherboard. Do the same like on the pictures up.

After when we put our sounds card into motherboard, and everything are on correct place we are nearly finished plugged in our card.

Hope this are helpful for you and I help little by you on this tutorial.
Make sure you follow everything step by step, and you read everything clearly!
Your sounds card should be working fine by doesn't have any problems ;-)
Remember!
Keep follow my blog for next tutorials ;-)
Hope that with this tutorial you can now plug in into your computer the sounds card, and with my tutorials everything working fine ;-)
Thank you for follow my blog, hope everything is fine ;-)
Don't forget about came back for more tutorials :)
Thank you,
Bit by Bit Computer
Tuesday 15 January 2013
How to connect printer?
Hi!
On the last tutorial today I want to show everyone my next tutorial about 'how to connect a printer?'. Likes you know printer are very useful piece on the computer, but the thing is no everyone know how to correctly connect it to computer. That's why I making little bit tutorial of how to connect a printer. Everything goin to be on the list, step by step ;-)
 |
| USB of our printer. |
 |
| USB plug into back of computer. |
3. So when we already find the USB ports in computer(they are on the front and back of the computer as well).
4. Plug the USB cable to ports wherever you want (front or back) and plug the same cable but on second way to the printer port (the two ports will be on the back of printer).
5. When we plug in the white cable that means we nearly connect our printer.
 |
| Back USB ports. |
 |
| Ports on the back of the printer. |
7. When we already connect the white cable with computer and black cable with contact then we can turn contact ' on ' and turn our printer to make sure everything work.
8. Your printer will be working, but make sure everything is connect correctly by printing something.
 |
| Black cable connect with contact. |
That is last tutorial today but I hope is very useful for you and when you goin to use my tutorial you correctly connect your printer to computer, and hope everything will working fine ;)
Keep follow my blog for next tutorials ;-)
Thank you for visiting..
Bit by Bit Computer
Monday 14 January 2013
How to connect a speakers?
Hi everyone!
Next tutorial came up and is everything about connection of speakers into computer. On this tutorial I show everyone how to connect a two speakers to computer. That was be sometimes complicate for some people but no for everyone:). This tutorial is makes for everyone, but more for this type of people who don't actually know how to connect a speakers system to computer.
Tutorial step by step:
1. Make sure that your computer is turned 'off '.
2. Plug speakers into the power socket.
 |
| 'Jack' are plug in on the back port. |
 |
| 'Jack' are plug in on the front port. |
5. After when you already push the jack on the green socket, now you must push the 'black' connection into the contact and turn contact 'on'. This should give the speakers work.
6. Turn your computer 'on' and speakers on 'here' volume. If your computer are processing of turning 'on' you will here the volume on operating system. If you here it that means you correctly do everything.
 |
| 'Jack' green connection on the back. |
 |
| Black conection on the contact. |
I hope that was help for you to connect the speakers and after reading my tutorial you correctly connect and set up your own speakers. :)
Come back on my next tutorial, which are how to connect a printer to computer.
Every tutorial I making on my best, hope every people or more people know now how to connect different parts of the computer by using and follow my tutorials. ;)
Bit by Bit Computer
How to connect and set up a mouse?
Hello!
Today on my next short tutorial I want to show everyone how to connect a mouse to our computer. Well this is no too hard and complicate, so that's why I make a short tutorial for some people who can don't know how to do this. Sounds very easy and on real world that exactly is:)
There are pretty similiar tutorial to this tutorial of how to connect keyboard. It is exactly the same things, but for clearly understanding I decided to write a short tutorial again for everyone.
 |
| USB connection |
1. Take a USB connection of your mouse, and look on the computer.
2. Find the USB ports on your computer (should be on the front and back).
3.Decide on which port do you want to connect USB of the mouse.
4. When you already decide where you want to connect your mouse, then put USB to exactly port where you want to connect it (front or back).
5. When you connect the USB into port, you can now used mouse :)
 |
| USB connect on the front |
 |
| USB connect on the back of computer |
Now I want to show you 'how to set up your mouse'. To do this:
1. Click on start button and on the start list click 'Control Panel'.
2. Click on 'Hardware and Sound' and then click on mouse.
3. You will see the opened window of 'Mouse Properties' so you can changed buttons, pointers look, pointers options, wheel and hardware.
4. If you decided to change something you must click 'Apply' to safe new options.
Tutorial was really short but every information of correctly connect of the mouse I write down on these tutorial.
Everyone should now when came up on my blog and see these tutorials will know how to connect a mouse:). That is no complicate and everyone can do that. So you can try :)
Keep watching my blog to see next tutorial. The next one are how to connect a speakers into computer.
Thank you for visiting, come back for next tutorials :)
Bit by Bit Computer
How to connect and set up a keyboard?
Hello!
Today on my next tutorial I want to show everyone how to connect a keyboard into our computer. It sounds very easy but someone can don't know how to do that. Everything I show step by step how to correctly connect keyboard into my computer.
 |
| Front USB connects |
 |
| USB connect on the back of computer |
1. First of all take a keyboard and look on the connector that you keyboard have.
2. Keyboard has USB connector, so you will look on the computer to find USB ports to connect keyboard to your computer.
3. There are lot's of USB connectors on the computer (about 10) you will see ports on the front and back of your computer.
4. Hold USB connector of your keyboard and connect to front or back of your computer.
 |
| USB |
 |
| USB connect on the front of computer |
 |
| USB connect on the back of computer |
8. Everything should be work correctly and doesn't have any problems. :)
Last thing is how to set up a keyboard correctly? Well you need to ensure that your regional settings are correct. To do this you must:
Open the control panel (it is on start list on the down left)> Date, Time, Language, and Regional Options > Regional and Language options. Then you make sure all the drop downs are correctly for your country.
1. Standards and Format - Regional options tab.
2. Location - Regional options tab.
3. Languages tab > Details Button > settings tab > Default input language.
4. Advanced tab top drop down.
After this changed your keyboard will working correctly with your country, so you doesn't may have any problems with 'typing wrong symbols'.
Short tutorial but for some people can be very useful.
I hope that on this tutorial every people should now know how to connect and set up (correctly) keyboard to computer and use it ;-)
I hope that this tutorial and overall my whole blog is very useful and I help little bit some people on these tutorials. Keep looking on my blog to see more interesting tutorials.
Thank you for came up on my blog, hope I help you :)
Bit by Bit Computer
Subscribe to:
Posts (Atom)